ZADIK PRECISION
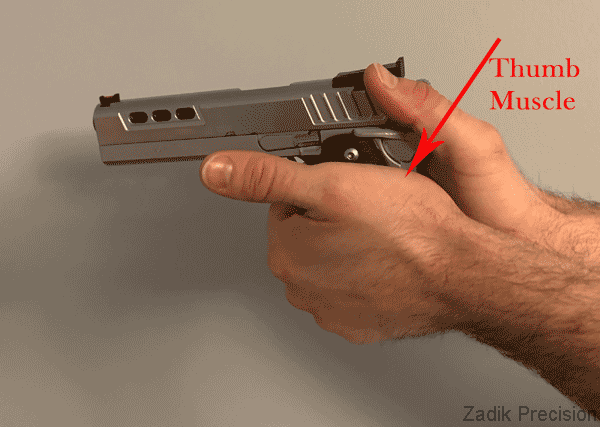
The thumb muscle is key to your support hand placement. Place your thumb muscle as high on the frame as possible while still being able to wrap your fingers under the trigger guard.
Securing the thumb rest
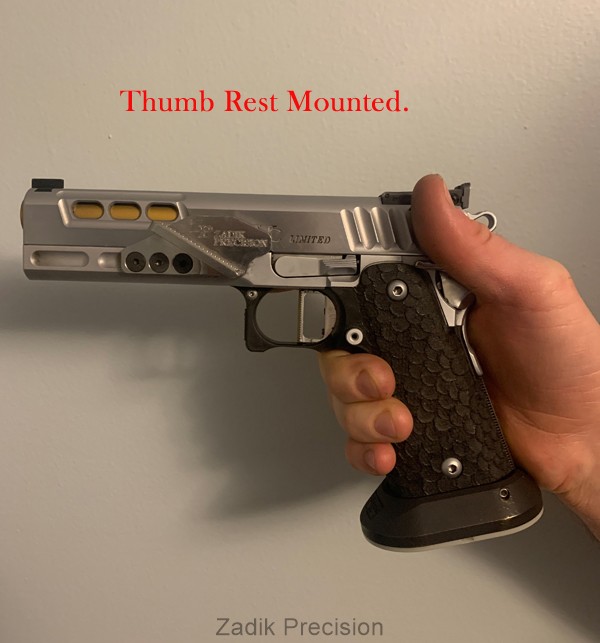
If all is well, we suggest you degrease the tapped holes and the screws before applying Loctite 271 or 2760 on the threads to securely mount your thumb rest. Do Not Over Torque the screws when tightening, a snug fit and allowing the Loctite to adequately cure ( 24 hours ) is sufficient.
Now, reassemble and check for proper slide function. If everything is OK, it's now time to holster up and retrain your grip. Practice Practice Practice...
If all is well, we suggest you degrease the tapped holes and the screws before applying Loctite 271 or 2760 on the threads to securely mount your thumb rest. Do Not Over Torque the screws when tightening, a snug fit and allowing the Loctite to adequately cure ( 24 hours ) is sufficient.
Now, reassemble and check for proper slide function. If everything is OK, it's now time to holster up and retrain your grip. Practice Practice Practice...
Check screws inside dust cover.
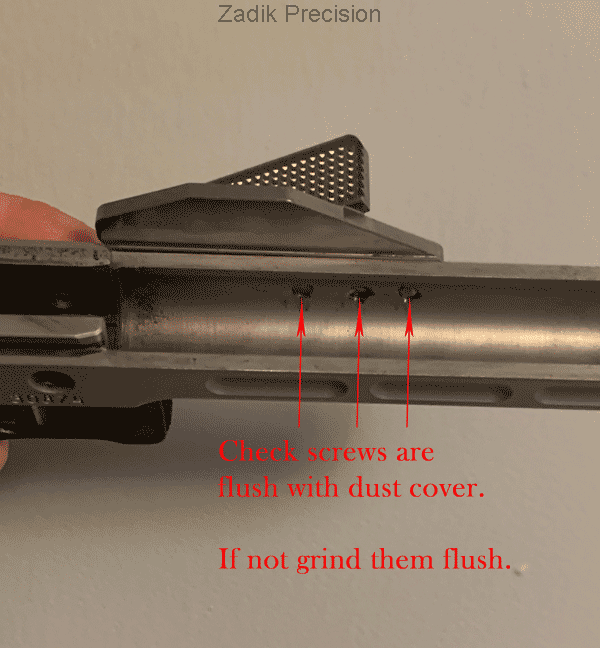
Once drilled, tapped and test mounted using our proprietary screws, check one more time to ensure the screws are flush with the inside of the dust cover. Trim flush with dust cover if required.
Once drilled, tapped and test mounted using our proprietary screws, check one more time to ensure the screws are flush with the inside of the dust cover. Trim flush with dust cover if required.
C-More 3 Hole Pattern.
The INTERNATIONAL 3 hole pattern is shown on the left, the holes are 10MM / .397 on center, your gunsmith will drill and tap your firearm as required for perfect placement. We supply three (3) proprietary screws which are metric size 4MM x 07. Our proprietary screws should not require trimming. However you must check to ensure they do not protrude into the dust cover well, slight trimming may be required to insure they are flush with the inside of the dust cover.
The INTERNATIONAL 3 hole pattern is shown on the left, the holes are 10MM / .397 on center, your gunsmith will drill and tap your firearm as required for perfect placement. We supply three (3) proprietary screws which are metric size 4MM x 07. Our proprietary screws should not require trimming. However you must check to ensure they do not protrude into the dust cover well, slight trimming may be required to insure they are flush with the inside of the dust cover.
C-more 5 Hole Pattern.
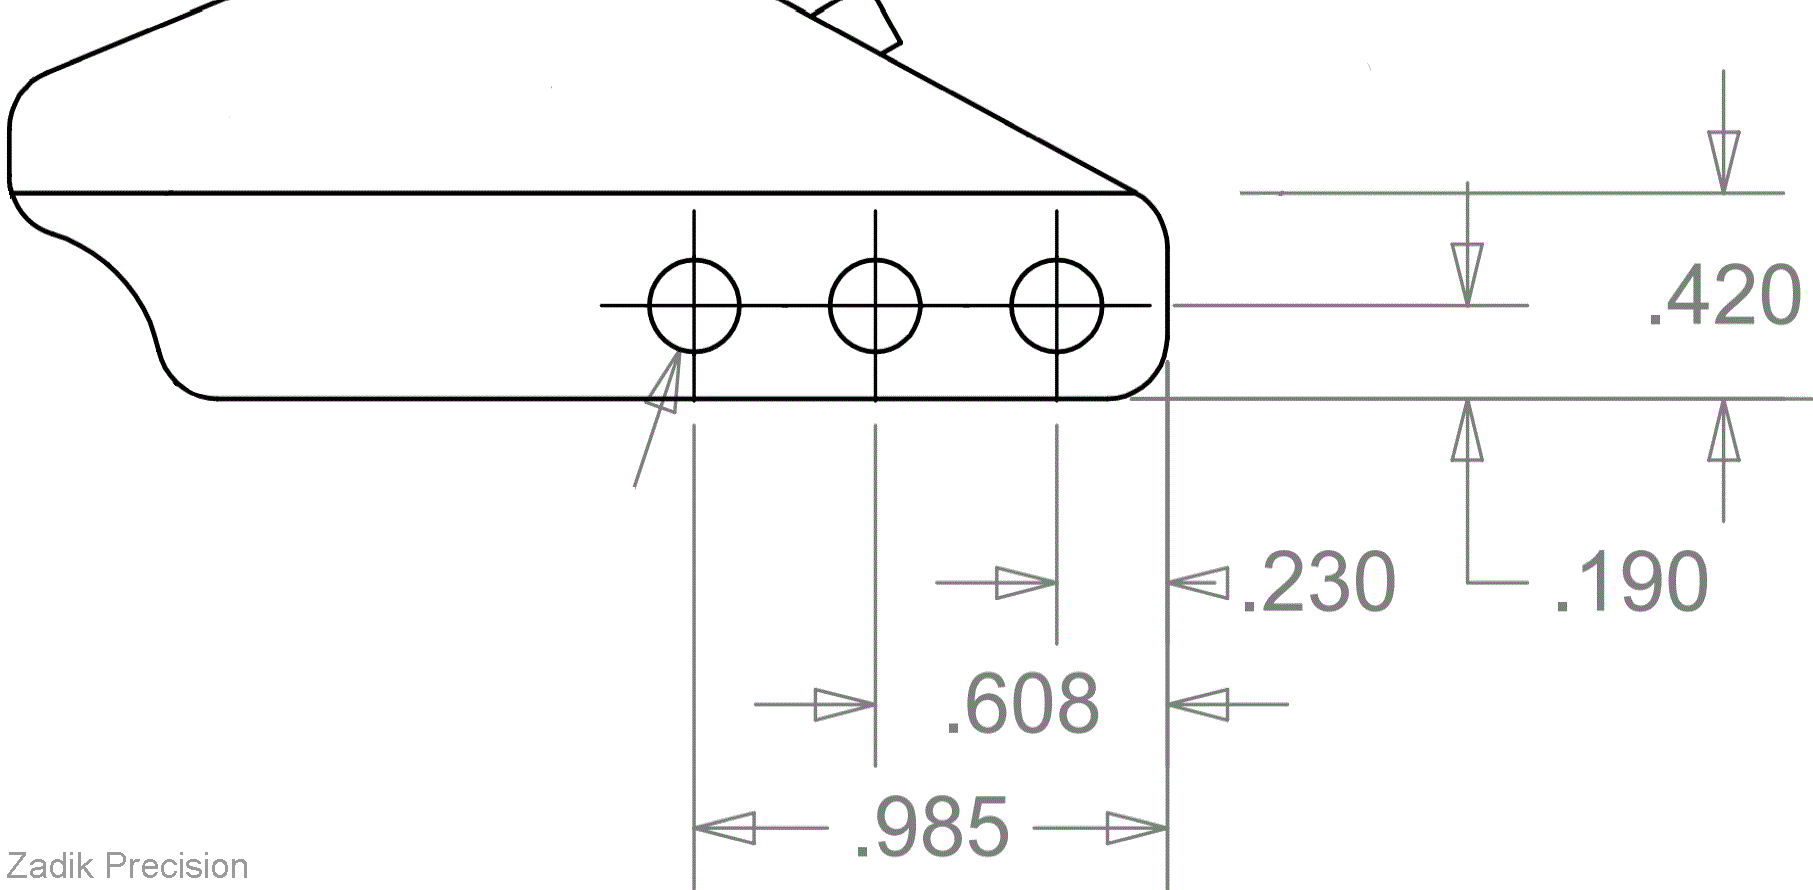
The C-More 5 hole pattern is shown on the diagram, the holes are .375 on center, your gunsmith will drill and tap your firearm as required for perfect placement. We supply three (3) proprietary screws which are size 5-40. Our proprietary screws should not require trimming. However you must check to ensure they do not protrude into the dust cover well, slight trimming may be required to insure they are flush with the inside of the dust cover.
The C-More 5 hole pattern is shown on the diagram, the holes are .375 on center, your gunsmith will drill and tap your firearm as required for perfect placement. We supply three (3) proprietary screws which are size 5-40. Our proprietary screws should not require trimming. However you must check to ensure they do not protrude into the dust cover well, slight trimming may be required to insure they are flush with the inside of the dust cover.
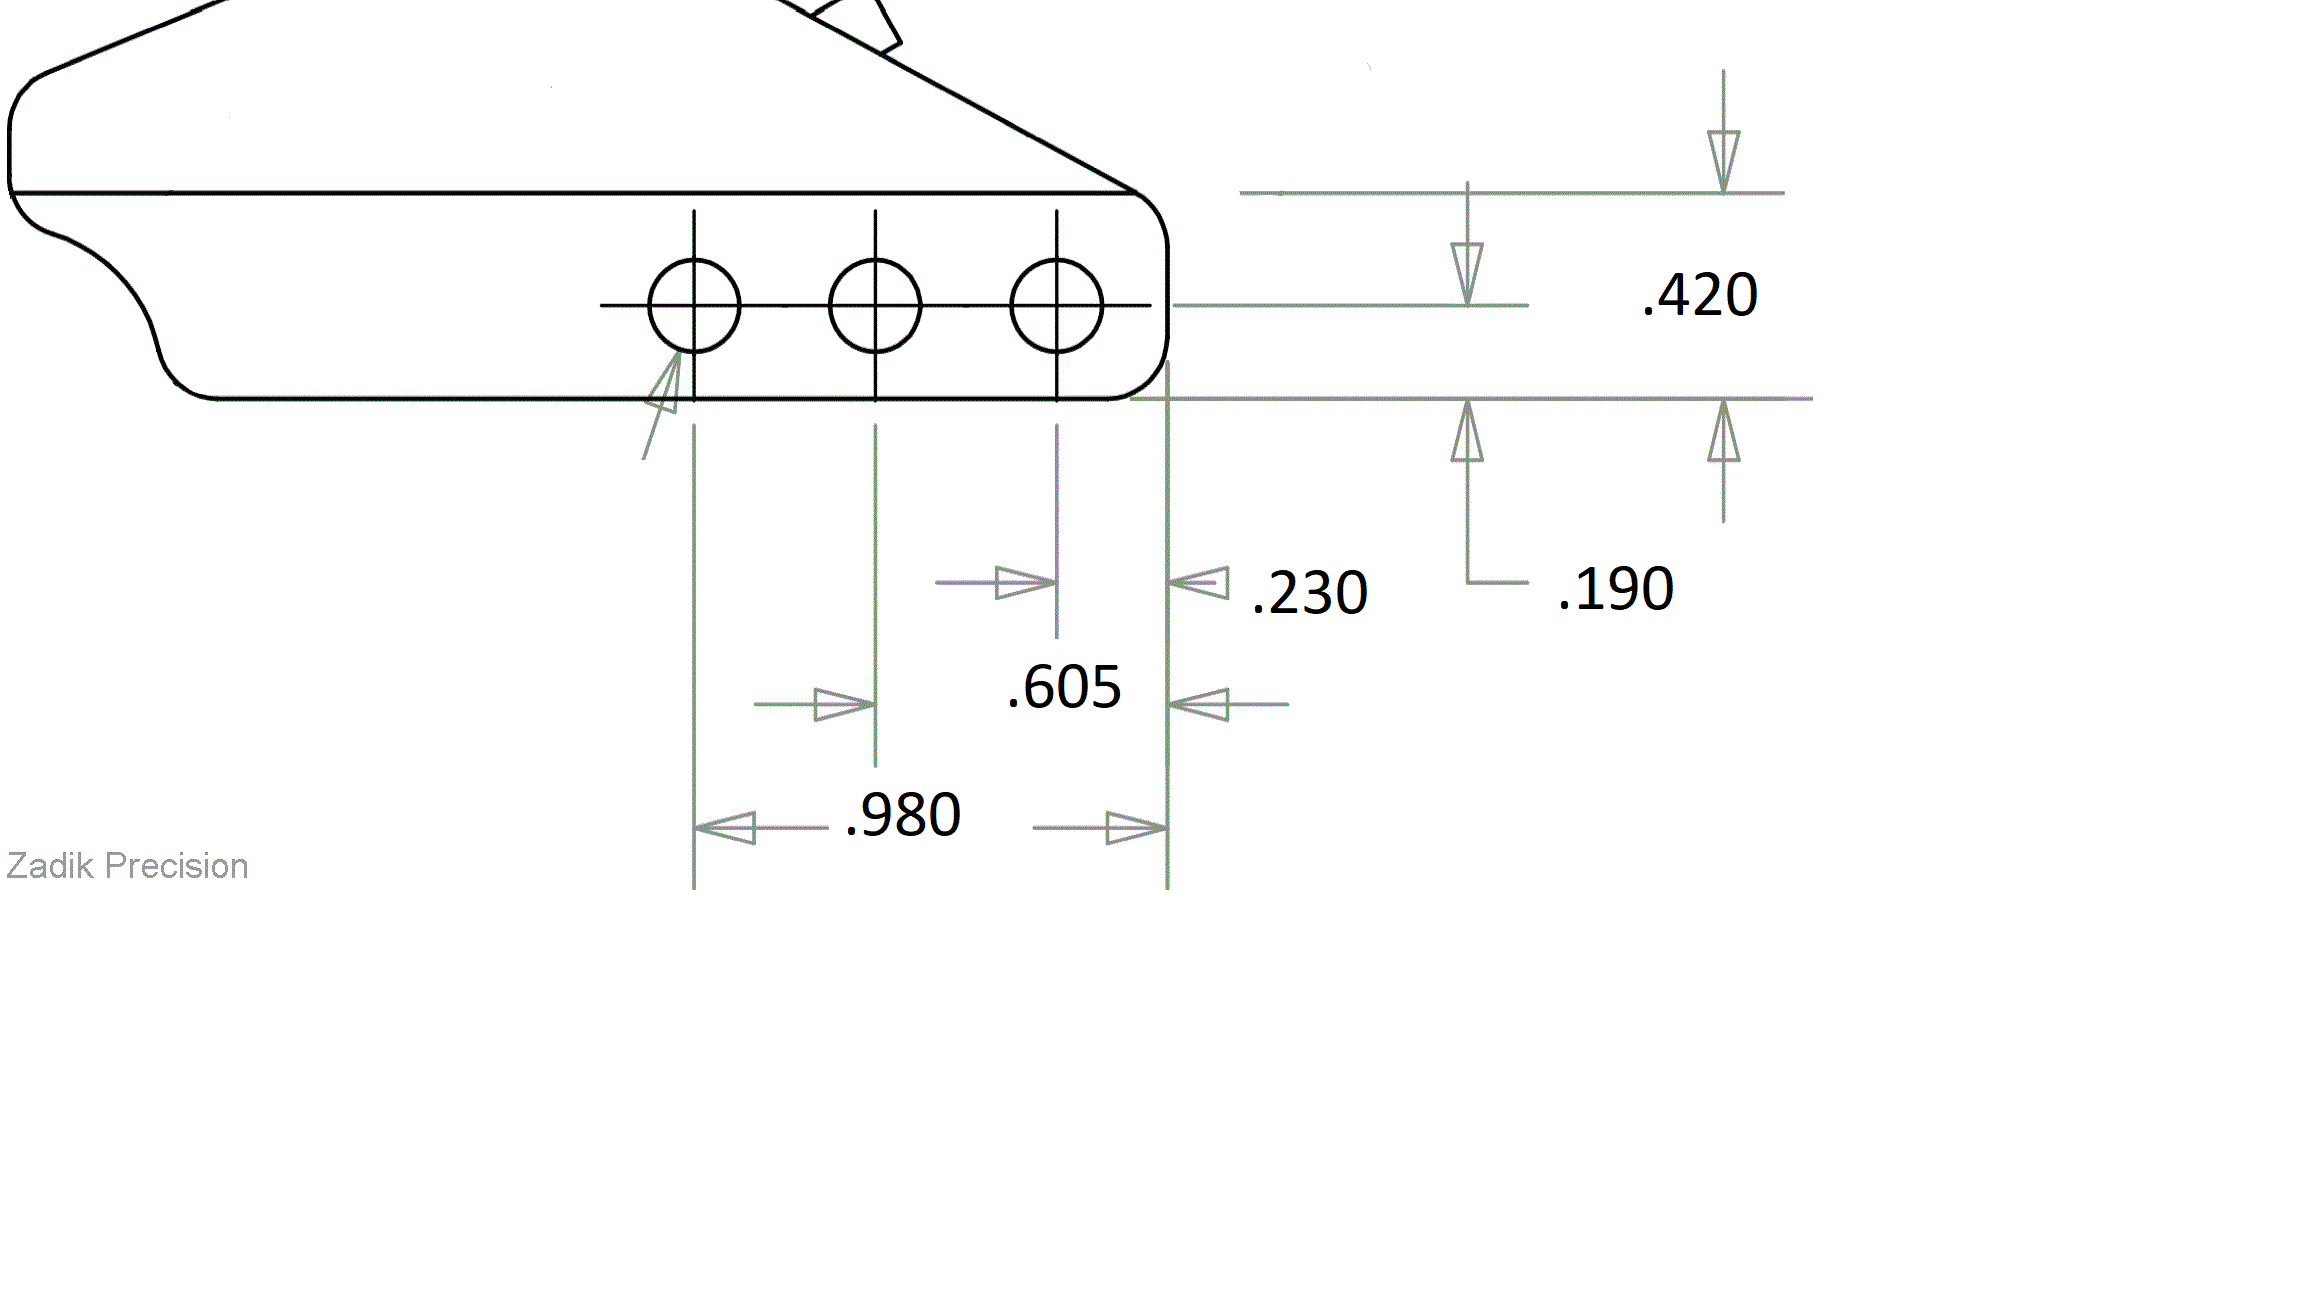
Hole Pattern Specifications
Align the relief
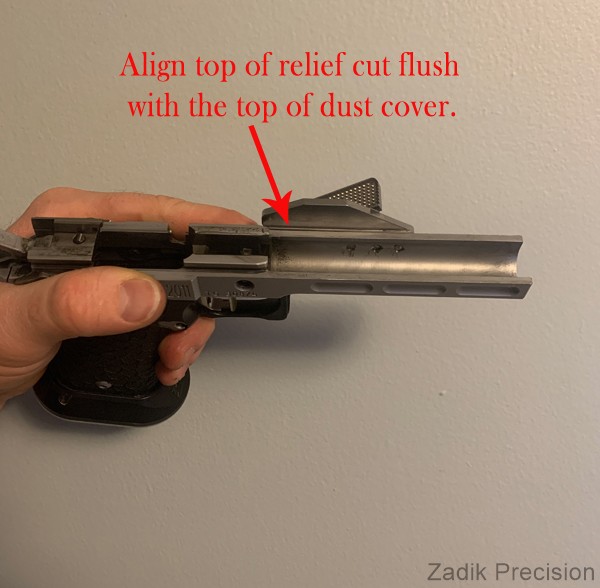
The back of the thumb rest has a relief cut to keep the thumb rest away from the slide. This relief should be aligned with the top of the dust cover and should absolutely not come in contact with the slide.
DO NOT PLACE OVER OR COVER YOUR SLIDE LOCK LEVER.
The back of the thumb rest has a relief cut to keep the thumb rest away from the slide. This relief should be aligned with the top of the dust cover and should absolutely not come in contact with the slide.
DO NOT PLACE OVER OR COVER YOUR SLIDE LOCK LEVER.
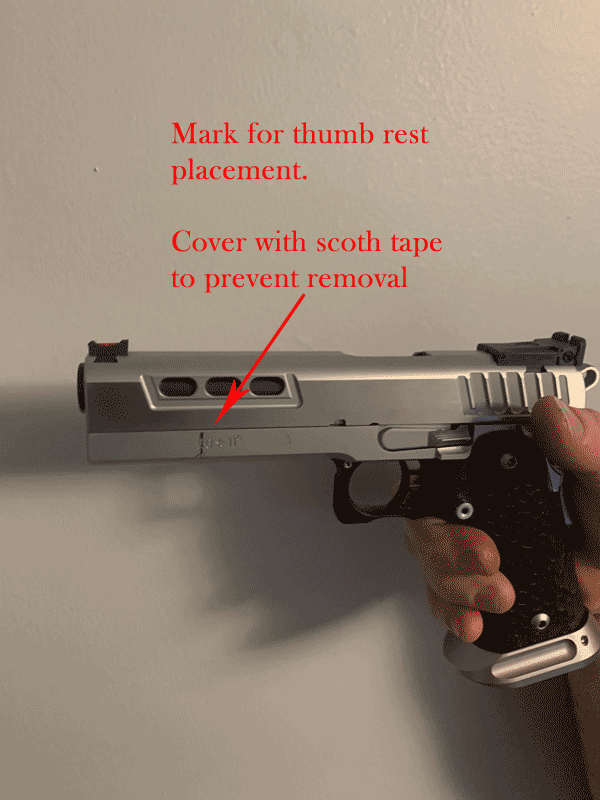
Front mark on dust cover shown. Cover this mark with scotch tape to prevent its removal.
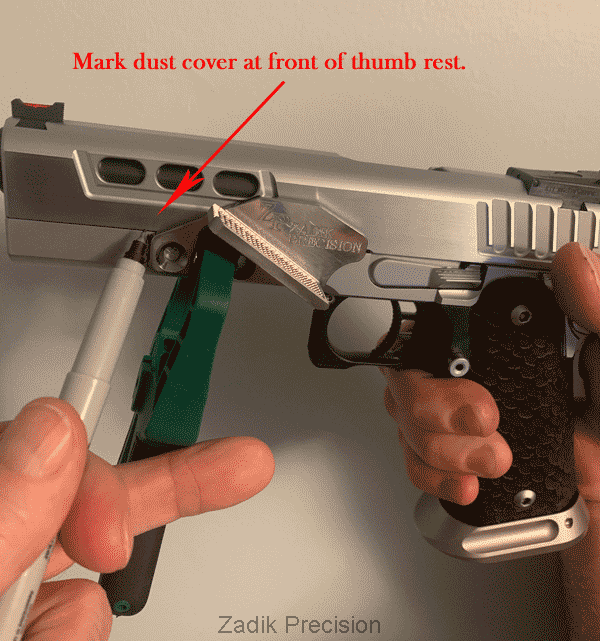
Mark the thumb rest's position
With the thumb rest clamped in position, mark the dust cover at the very front of the thumb rest — you can also mark the rear of the thumb rest along the lower curvature. If possible, leave the thumb rest clamped in position for your gunsmith. Once at your gunsmith, test your grip again to ensure it is correct so your gunsmith can measure the position accurately.
With the thumb rest clamped in position, mark the dust cover at the very front of the thumb rest — you can also mark the rear of the thumb rest along the lower curvature. If possible, leave the thumb rest clamped in position for your gunsmith. Once at your gunsmith, test your grip again to ensure it is correct so your gunsmith can measure the position accurately.
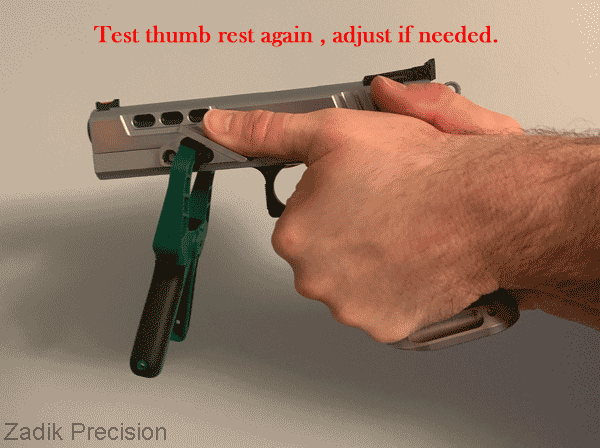
Test thumb rest position.
Now place both hands on the frame to test your grip. Ensure the thumb rest is clamped in the proper position — your support hand should be high on the firearm and your thumb pad should be centered along the bore of the barrel. Check to see if your thumb rests on the paddle naturally and comfortably. The bottom of the slide should be halfway along the full length of your thumb. If not, adjust the thumb rest slightly for proper placement and test your grip again.
Now place both hands on the frame to test your grip. Ensure the thumb rest is clamped in the proper position — your support hand should be high on the firearm and your thumb pad should be centered along the bore of the barrel. Check to see if your thumb rests on the paddle naturally and comfortably. The bottom of the slide should be halfway along the full length of your thumb. If not, adjust the thumb rest slightly for proper placement and test your grip again.
Clamping the thumb rest
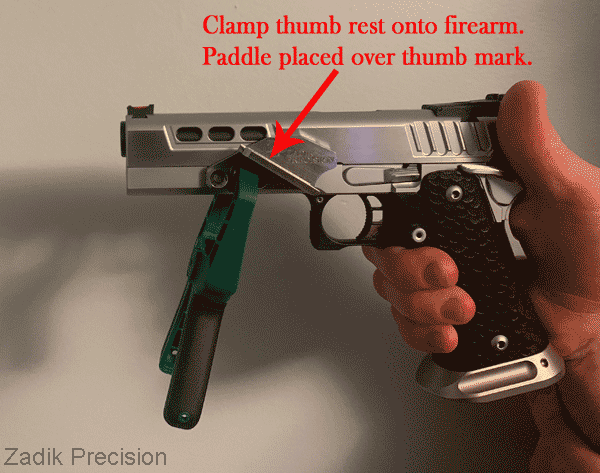
With your frame on its side, align the thumb rest paddle with the angled mark you made on the dust cover. Align the relief cut on the back of thumb rest with the top of the dust cover. Now clamp in place.
With your frame on its side, align the thumb rest paddle with the angled mark you made on the dust cover. Align the relief cut on the back of thumb rest with the top of the dust cover. Now clamp in place.
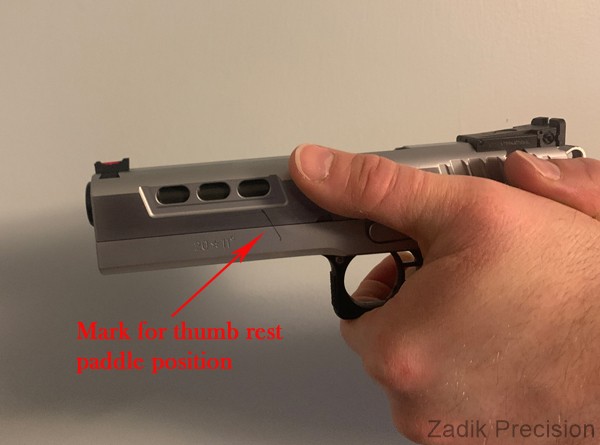
Thumb angle marked on frame's dust cover. This is the thumb rest paddle position for your grip.
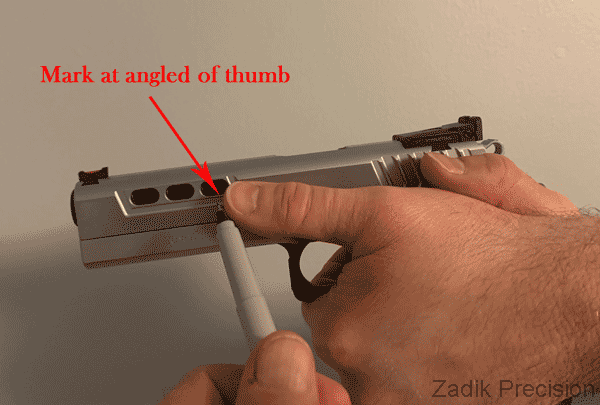
Mark the thumb angle.
Following the pad of your thumb, mark the dust cover with a Sharpie — this is where the paddle of the thumb rest is to be mounted.
Following the pad of your thumb, mark the dust cover with a Sharpie — this is where the paddle of the thumb rest is to be mounted.
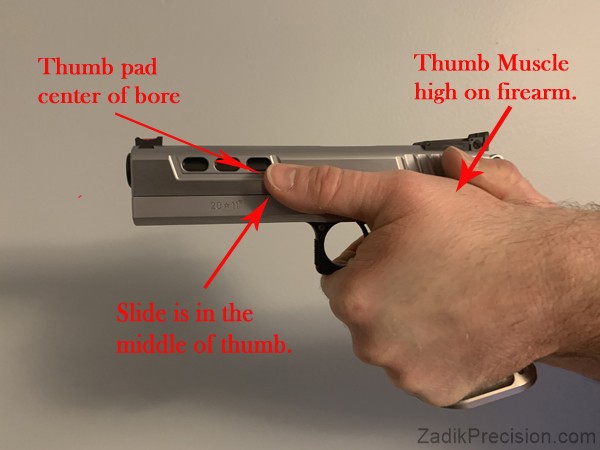
Strong Hand Placement.
Your support hand should be as high on the frame as possible with your thumb comfortably extended straight out along the side of the frame.
Your support hand should be as high on the frame as possible with your thumb comfortably extended straight out along the side of the frame.
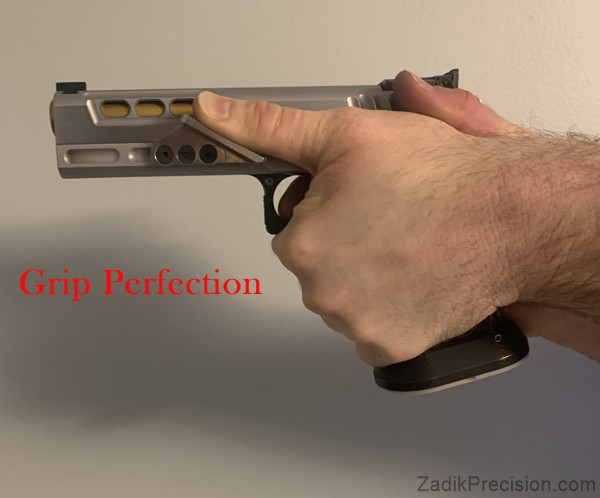
Fitting
We recommend a qualified gunsmith should mark and measure the thumb rest placement based on the correct grip we describe below. The mounting requires the exact placement and precise drilling & tapping of holes in the dust cover of your frame.
We recommend a qualified gunsmith should mark and measure the thumb rest placement based on the correct grip we describe below. The mounting requires the exact placement and precise drilling & tapping of holes in the dust cover of your frame.
Stop - Be Safe
Make sure your chamber is empty, and the magazine has been removed before mounting.
Keep all rounds and loaded magazines away from your work area.
Make sure your chamber is empty, and the magazine has been removed before mounting.
Keep all rounds and loaded magazines away from your work area.
Mounting 2011 Thumb Rests.
Mounting Instruction for Untapped Frames.
By Zadik Precision
Mounting Instruction for Untapped Frames.
By Zadik Precision
Your thumb should be resting so the bottom of the slide is in the middle of your thumb. Your support hand should naturally cant forward. Now your thumb is in line with the center of the barrel's bore.
© 2026 Zadik Precision LLC. All rights reserved. This article may be referenced or excerpted with attribution and a link back to the original source at https://zadikprecision.com. Reproduction of this article in full without written permission is prohibited.
